How To Set Up A Scavenger Hunt

Home

A scavenger hunt is a great way to add some excitement and competition to any party or event. There are many different ways to set up a scavenger hunt, so you can tailor the game to fit your specific event. Here are a few ideas to get you started:

Make a list of items that can be found around the house or party venue. This is a great option if you have small children, as it can be done indoors and doesn’t require any special equipment.

Send your guests on a treasure hunt around the neighborhood or local park. This is a great way to get everyone moving and exploring.

Make a list of tasks or challenges that must be completed in order to win the game. This can be anything from taking a selfie with a stranger to singing a song in public.

For a more competitive scavenger hunt, divide your guests into teams and see who can complete the most tasks in the allotted time.

Get creative and come up with your own unique twist on the classic scavenger hunt. Whatever you do, make sure it’s fun and everyone has a chance to win.

Go mobile! If you really want a modern Mobilevent then you need to download the treasure hunt app. This app transforms your surroundings into a giant scavenger hunt, with clues and riddles leading you to different landmarks and historic locations. It’s the perfect way to learn more about your community while spending time with family or friends. And who knows, you might even find some real treasure along the way!

There are many different ways to set up a scavenger hunt, so the best ideas will depend on your specific goals and audience. However, some general tips for creating a successful scavenger hunt include making the clues challenging but not too difficult, providing a good variety of tasks to complete, and ensuring that the prize is something that everyone will be excited about.

What Are Blythe Dolls?

Home

Blythe dolls are a type of fashion doll with large eyes that was introduced in 1972 and became popular in the early 2000s. The doll’s unique appearance and ability to change eye colors and hairstyles made it a favorite among collectors. Blythe dolls are typically between 11 and 12 inches tall and have an over-sized head with large eyes that can be changed to different colors.

The dolls were originally produced by Kenner Products, but production ceased in 1977. In 2000, toy company Takara Tomy re-launched the Blythe doll line and has since released numerous limited edition dolls.

Blythe dolls are still being made and are available for purchase from a number of different retailers. This Is Blythe is the biggest producer of high quality Blythe dolls and a Blythe doll accessories in the world. You can read a lot of This Is Blythe reviews online to verify their quality and popularity as well.

While the dolls are not as popular as they once were, there is still a large community of collectors and enthusiasts who maintain an active interest in them. The dolls have seen something of a resurgence in popularity in recent years, due in part to increased exposure through social media.

Replacing Old Oak Skirting Boards

Home

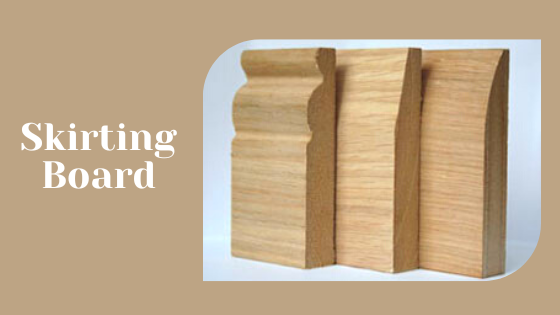
If the rooms in your home have old oak skirting boards, you may be ready to replace them with new ones. Maybe you want to change them because they look outdated, or perhaps the skirting boards have been damaged over the years and you want fresh oak skirting. You may even be installing them for the first time in a room that doesn’t currently have them, in order to give the room a new look. Whatever the reason, here are some easy steps for installing oak skirting boards.

First, you will need to take a measurement of the room you are working in, or just measure the old skirting boards. You will use this measurement when you buy new materials from your supplier. It is always a good idea to give yourself a little extra material to work with, in case your measurement is a little bit off the first time.

To remove the old skirting, find the studs with a stud locator. Use a flat-nosed screwdriver in between the skirting and the wall, going as deep as necessary in order to reach the stud. Create a space between the skirting and the wall by pushing on the skirting board. You can use a crowbar to pry it the rest of the way from the wall. Do this all the way around the room until all of the old skirting is removed.

It’s a good idea to measure each wall again as you go along, to make sure that you are using the right length of oak skirting for each wall. Remember that you need to create an angle at the end of the oak skirting so that it can connect with the other boards. The end of one board needs to line up with the next, and failing to cut an angle at the end of each board would create a gap in the corner where they come together.

Fit the oak skirting into place. Use the stud locator again to find exactly where the studs are. When you find them, you need to mark them. Use wood screws or nails to attach the oak skirting to your wall. It is important that you securely fasten the oak skirting to the wall in order to prevent it from coming detached later on down the line. Once the board is fitting properly into place and secured, fill the gaps between the skirting and the wall with decorator’s caulk.

And that is pretty much it! This tends to be an extremely popular do-it-yourself project, because oak skirting boards are very easy to install, and durable as well. The color also makes the oak skirting aesthetically appealing. Installing oak skirting boards in any room is a pretty simple job, one that any do-it-yourselfer should have no problem with.